
Your Cart is Empty
The main aim with all hanging options apart from the disc plate hanger is to create a strong cradle to sit your artwork within upon the wall. The suitability of the materials you choose to use should depend on the type of wall you wish to display your artwork on. If you are at all unsure about which option best suits your situation it would be good to ask a handy person.
It is recommended that you use a set square and spirit level when hanging your artwork to ensure correct installation.
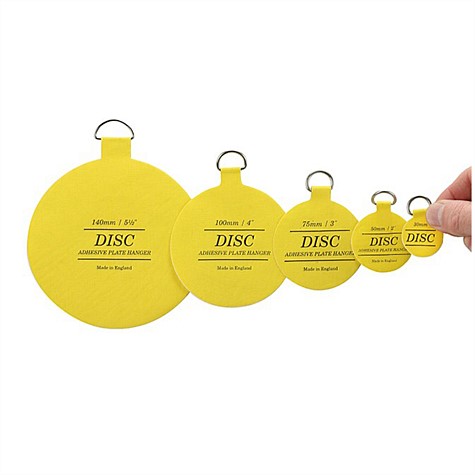
1. Disc Adhesive Plate Hanger
The disc adhesive plate hanger is is a great option if you are choosing to display your artwork indoors (not including LARGE 1200mm size). Simply attach the plate hanger to the back of your artwork and hang over a suitable nail or hanger on your wall.
2. Z Clips
These Z Clips are commonly used to hang mirrors. These are suitable for hanging every size of my solid panel weatherproof art either indoors or outdoors. Mark out the four corners of a square that matches your chosen artwork size (use square sizing guide below) and then screw the Z Clips in to the wall creating a cradle for your artwork to sit in. This is a very solid and permanent option so you should be sure of where you are choosing to locate your artwork. I recommend pre drilling the screw holes and using wall plugs to ensure a secure attachment.
3. Solid Panel Fixing Clips
If you like the strength of the Z Clips above but prefer not to have the hardware visible on your wall around the artwork these solid panel fixing clips are a great option. And they're available to purchase right here on my website! Again these are suitable for hanging every size of my solid panel weatherproof art either indoors or outdoors. Mark out the four corners of a square that matches your chosen artwork size (use square sizing guide below) and then screw the clips in to the wall creating a cradle for your artwork to sit in. The non sprung clips should be at the bottom. This is a very solid and permanent option so you should be sure of where you are choosing to locate your artwork. I recommend pre drilling the screw holes and using wall plugs to ensure a secure attachment.

4. Four nail cradle
This is the least visible hanging option and uses exactly the same principle as the Z Clips and the Solid Panel Fixing Clips, but instead you use four nails. This is a great option for indoors display and potentially outdoor areas with little to no wind. The size of artwork you are displaying should influence the type of nail you use. The SMALL 285mm size can be hung easily with small lightweight brass nails, but the LARGE 1200mm size will need something stronger.
Use this sizing guide to see how big the square you sit your artwork within should be.


